
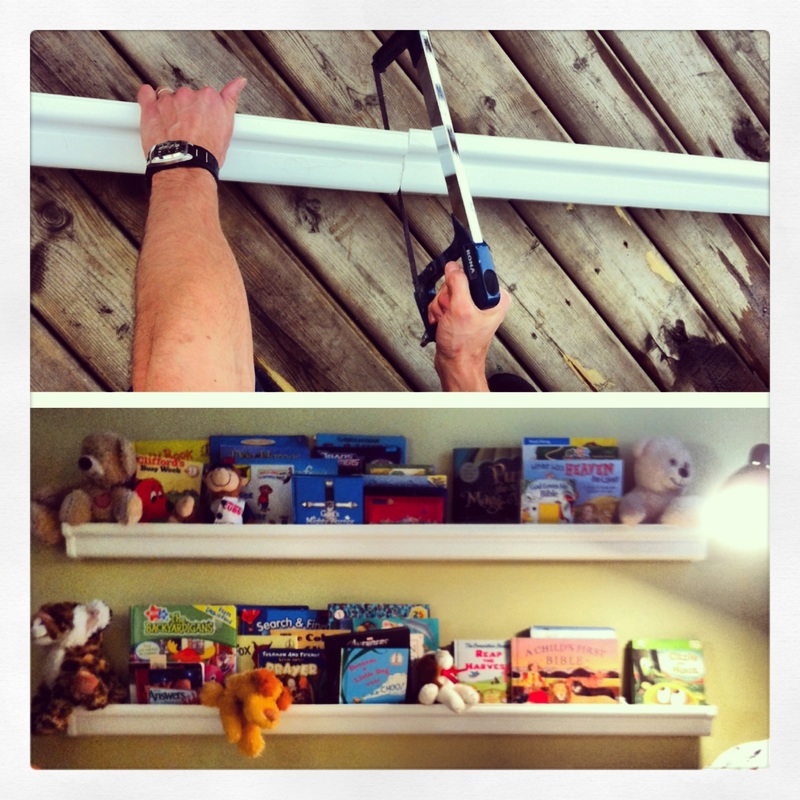
 Tools required: 3" screw for each mounting hanger Drill Tape measure Hacksaw Stud finder Level Step 1. Go to your local hardware store and purchase as many lengths of vinyl eavestrough as desired. Purchase 2 end caps each each shelve and enough mounting clips to install one every 3' along the length of your shelf using a minimum of 3 per shelf. Step 2. Cut the vinyl eavestrough to the desired length of shelving using the hacksaw. Measure and mark your cut on the front, bottom and back of the eavestrough to ensure a straight cut. Step 3. Select the desired location for the shelf and locate the wall studs using the stud finder. Measure and mark out the stud placement on at least three studs as evenly spaced as possible ( studs are built into your wall every 16") along the length of your shelf, or one every 3', whichever is greater. Use the level to ensure level placement of the hangers. Step 4. Using the 3" screws and drill, install the hanger brackets along the studs you just marked out. Ensure they are level. Step 5. Clip the end caps onto the length of eavestrough to be installed and clip the eavestrough into the hanger brackets firmly. Your eavestrough is now a shelf 
0 Comments
Your comment will be posted after it is approved.
Leave a Reply. |
Sara Lynn InteriorsHOME AND GARDEN BLOG Archives
October 2013
Categories |
 RSS Feed
