
|
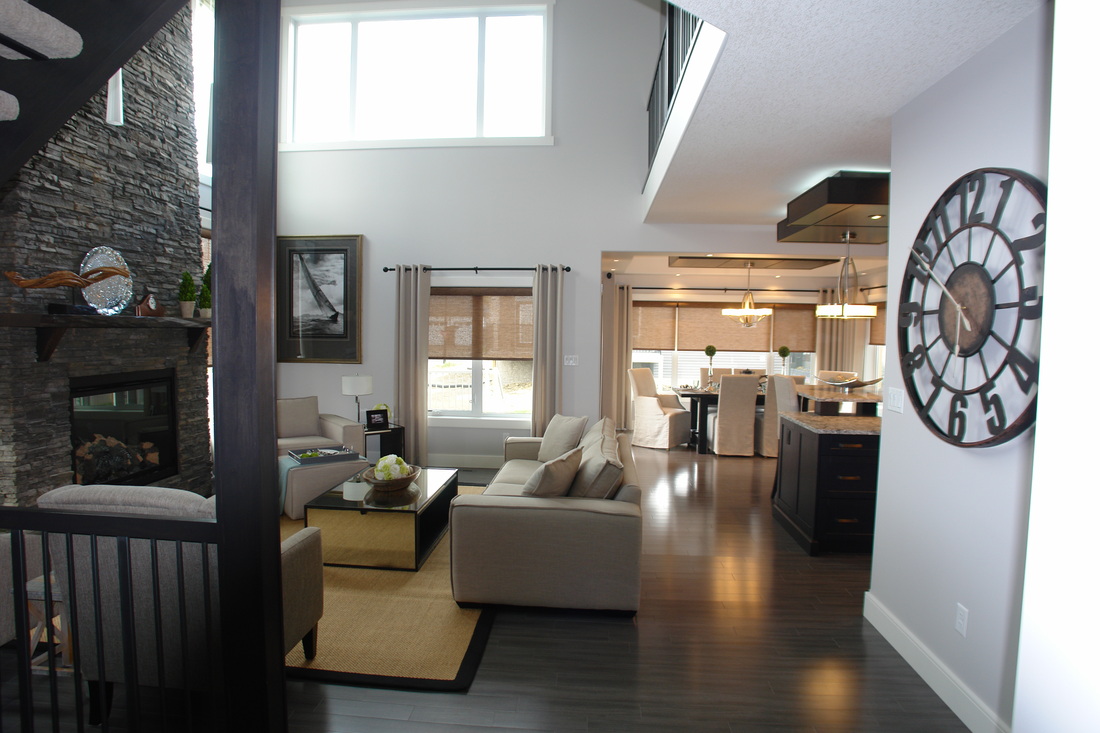
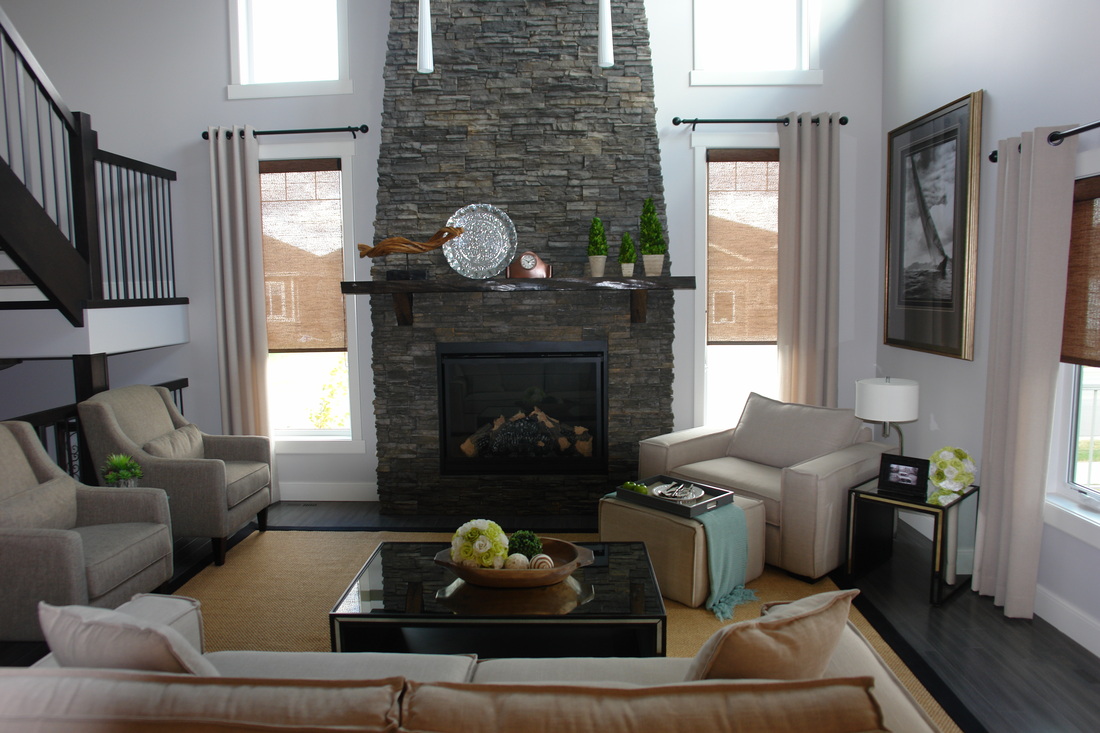
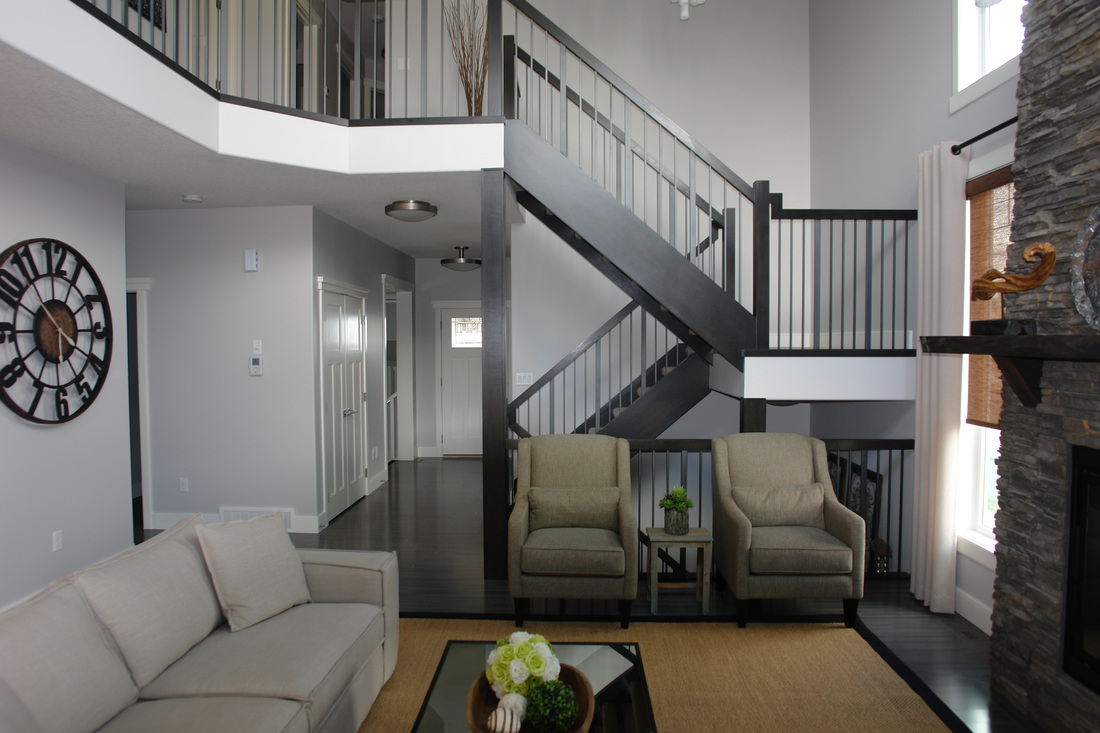
When asked to Design and Decorate a showhome for Homes by Sherbilt, I was very excited. It was a pleasure to work with Darell and Dori Koop. I wanted to share a few pictures with all of you! For more information on this builder please go to www.sherbilt.com 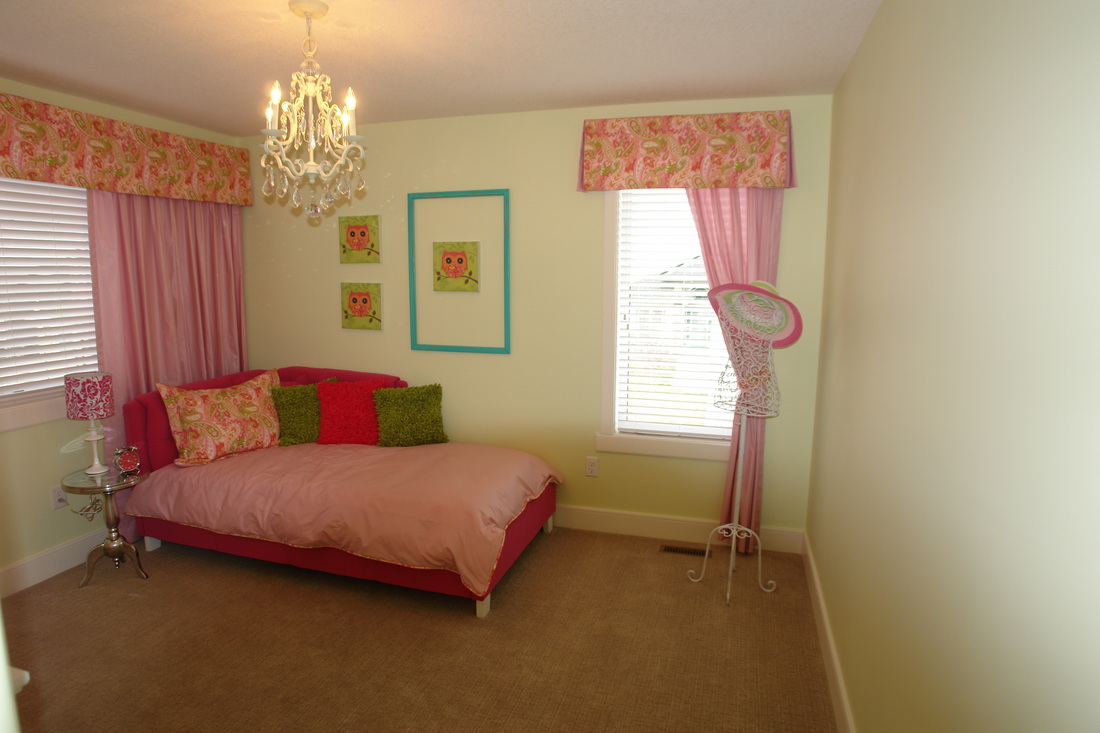 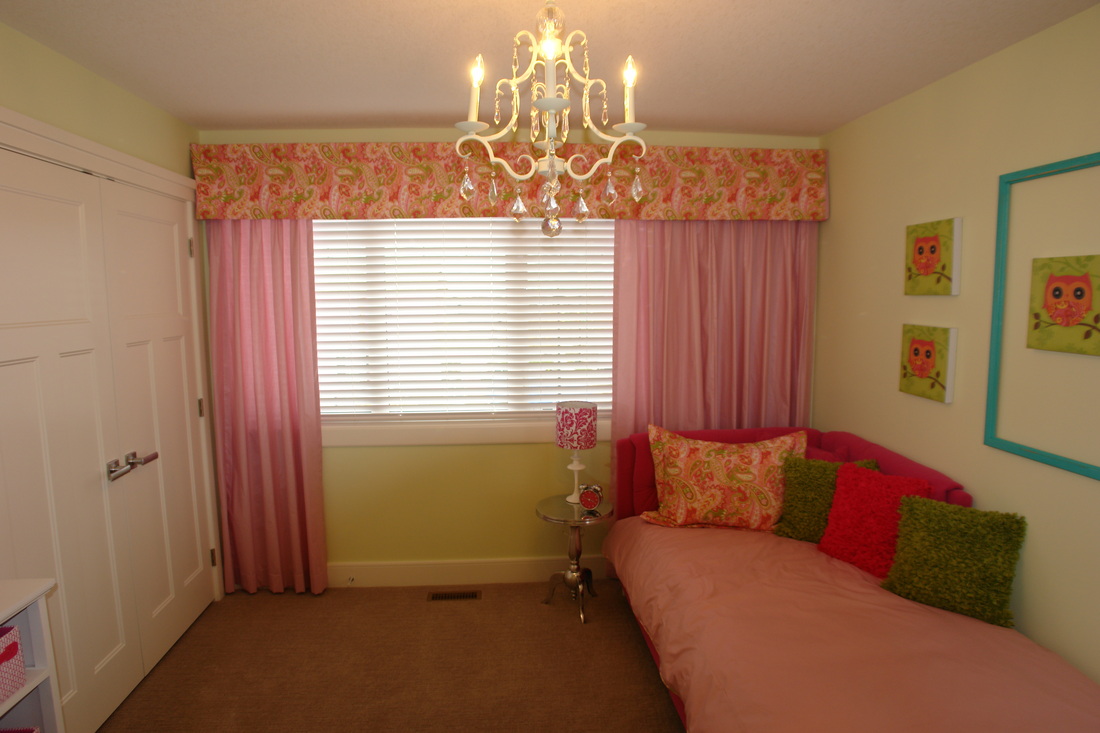 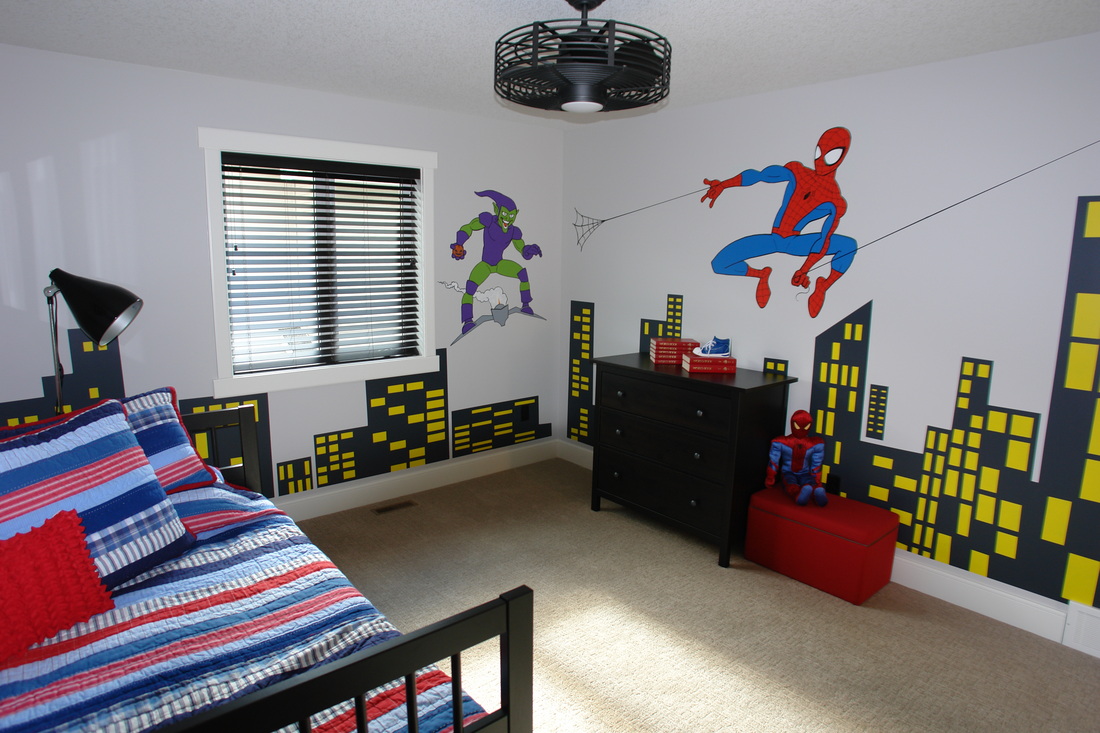 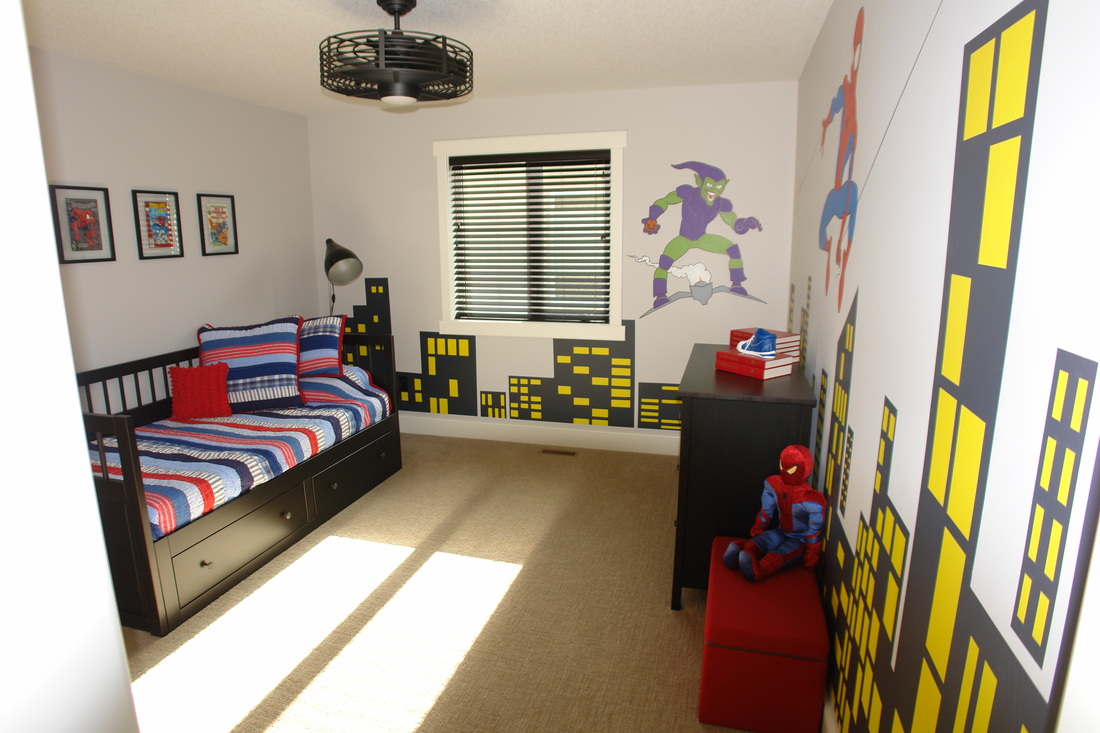 I'm really excited to invite you all out this weekend to the Lowe's North Edmonton Grand opening! Hope to see you there! -Sara  1. Set a goal and make a plan. Envision the end product. Decide first on what you want, how you're going to do it and when you would like to start and finish it. 2. Set a budget. Avoid disappointment and stick to a budget. It will set boundaries and help keep your project on track. The end result will be much more rewarding. Keep in mind, there are almost always additional costs that come up unexpectedly, so set aside a contingency fund. 3. Be bold and Brave. Minimalist, traditional, rustic, funky- with so many themes to chose from, maybe its time to try something new. You'll never know unless you try. 4. Follow your gut. If you aren't sure of something, skip it or go back to your first choice. If you have your heart set on something but a sales person sways you in another direction, go back to you first choice. Its your home and your style that should be portrayed. 5. Seek professional advice. If you get stuck or need help along the way. don't be afraid to call in a design pro! It'll save you money and time in the long run. 6. Be patient. Rome wasn't built in a day. You don't want your contractors to feel pressured to meet unrealistic deadlines. Be patient and trust that it will get done with optimal results. 7. Relax and Enjoy! Be sure to celebrate once your project is complete. It's so easy to just move onto the next thing, but its more important to savour your accomplishment. Plan a party or grab a bottle of wine and enjoy!  Come out and enter our draw for a FREE CONSULTATION!
I usually start my week out by catching up on emails and filing last weeks papers etc..Today when I checked my inbox I was delighted to read this lovely note of thanks from a client that I had met for a consultation on Friday. It was so nice of Kristy to take the time out of her busy life to write me, you really made my week Kristy!! I thought I'd share the note with all of you because it is so nicely written. Take a read if you'd like and hope you have a great Monday too! Hi Sara, Thank you so much again for squeezing us in last Friday! It was such a pleasure to meet you and I honestly felt like hugging you when you were leaving!!! We (ok, maybe not Scott) are SOOOO excited about all of the ideas and suggestions that you gave to us!! I can’t believe how different the house looks by just changing the furniture around!!!! We were really busy this weekend trying to incorporate some of your ideas! We got the backsplash done and got the kitchen painted. Oh my gosh…..it’s a COMPLETELY different kitchen!!! It looks so amazing and I can’t even believe that it is my house!!! The “Flint” blue on the back wall absolutely pops with the backsplash and the kitchen cabinets! I have always hated those cabinets and now I actually like the way they look. It looks exactly the way I wanted it to, without even knowing what I really wanted….. I used the leftover paint that we had for the hall(as per your suggestion) and it looks great too. Then I used the “Thunder” color for the rest of the kitchen and we moved the hutch to the living room and brought in the “booze cabinet”. We haven’t put the curtains back up or the picture on the wall yet, but even without those finishing touches, it is completely SPECTACULAR!!!! I honestly can’t thank you enough!! I am so over-the-moon excited that we are making some amazing changes to our house and that we have a plan of action for the next couple of years! My brother in law also said that he wouldn’t mind putting stone on the whole wall instead of just the fireplace!! We’ll get that done in the next 6 months or so, so I will paint that wall grey in the meantime. I wanted to wait until the picture and curtains were back up before sending you a picture. I can’t believe how a few coats of paint, a different backsplash and furniture rearrangement changed the look and feel of our house!!! Anyway, I just wanted to send you a note of thanks!!! I was a little apprehensive to get a decorator in because I wasn’t sure what to expect. I was a little worried that a decorator would say that we would have to change everything about our house and furniture to make it look good. You are very down to earth, approachable and have unbelievable vision!!! You certainly have a true gift for design and I am already telling all of my friends about you!!!! I will send a pic this week, I honestly can’t thank you enough! Sincerely, Kristy
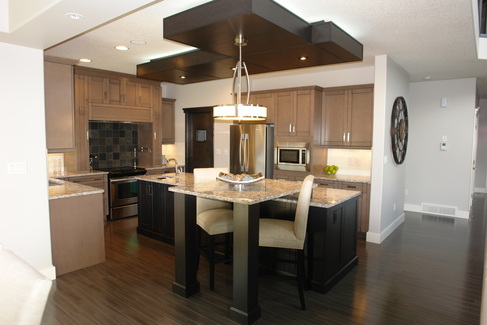
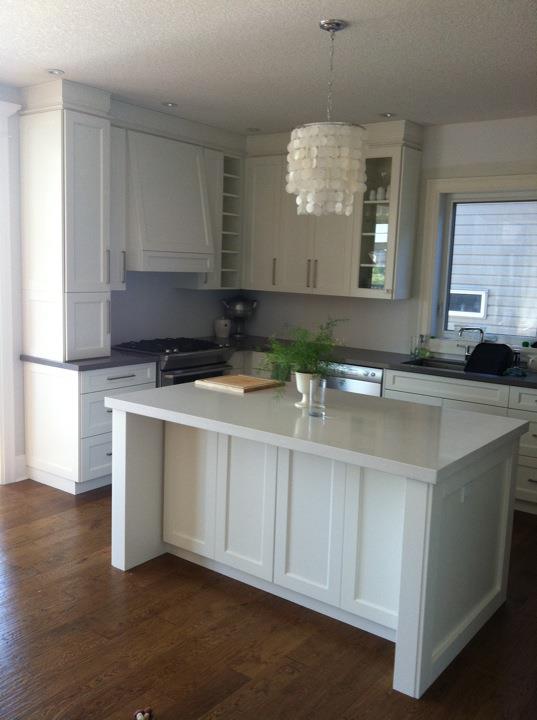 This is a kitchen project that I completed back in 2011. I fell in love with white cabinets after working on this one and finding a perfect white with the home owner. After some careful consideration I took on the task of transforming my own wood cabinets to white. They were too new to replace so my painter decided to use the Benjamin Moore cabinet paint. Wow, is it ever amazing. After 3 months we still have no scratches and they look absolutely perfect. I still have some tile work to finish up but once it's done I promise to post some pictures of it. 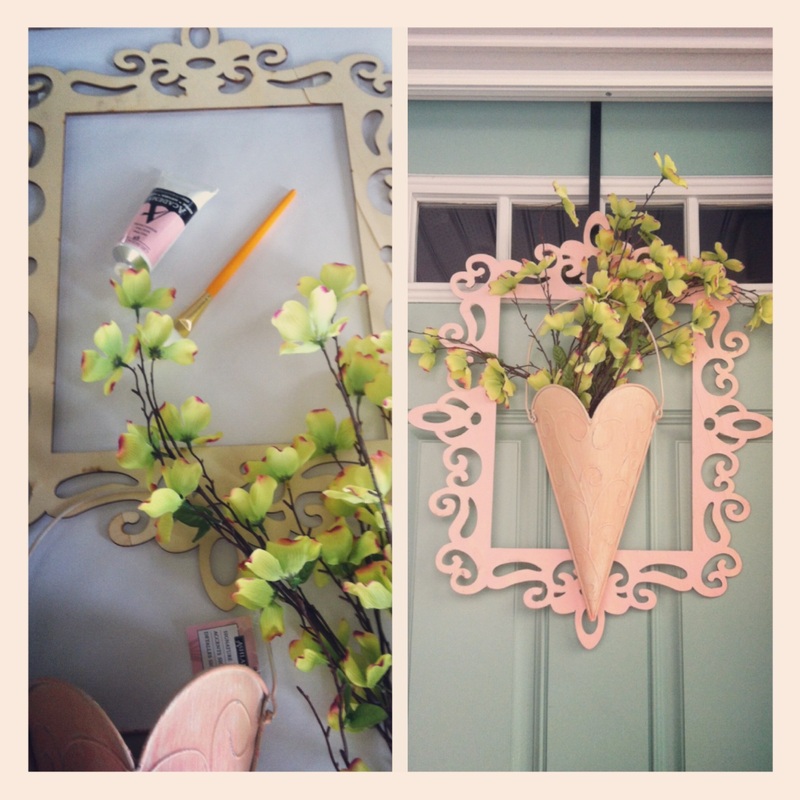
I was feeling the need for some flowers and something a little bit bright and vibrant today so I made this simple wreath for my front door. Everything in the picture can be found at Michaels Craft Store. Have Fun making yours!!:-) Spring is coming!! The colour I used was Pale Pink. -Sara
Found this perfectly sized candy dish at one of my favourite stores a few weeks ago. Thought I'd share! This pretty dish can be found at Crate & Barrel. 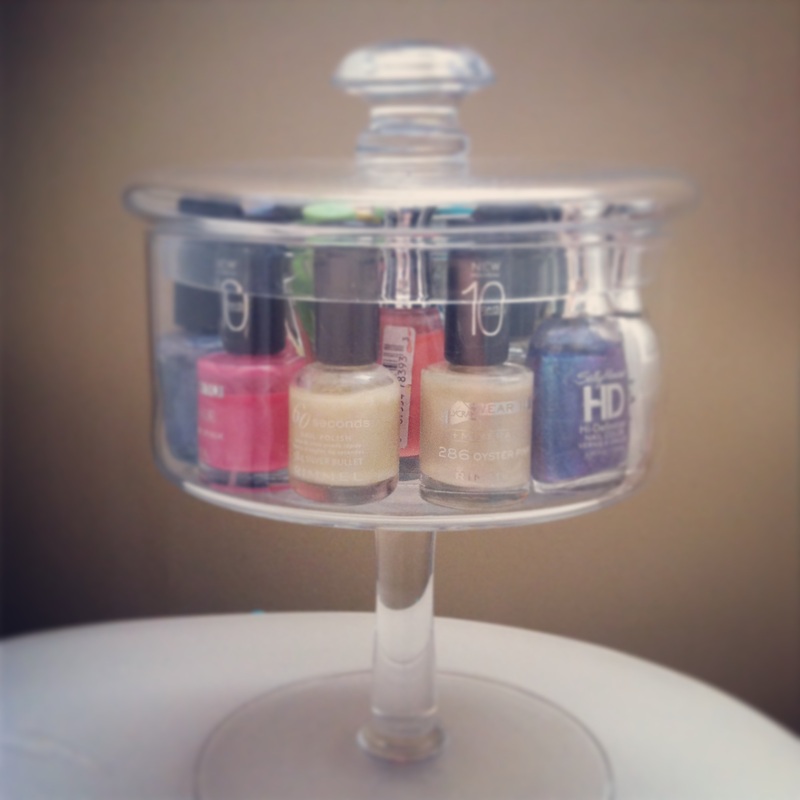 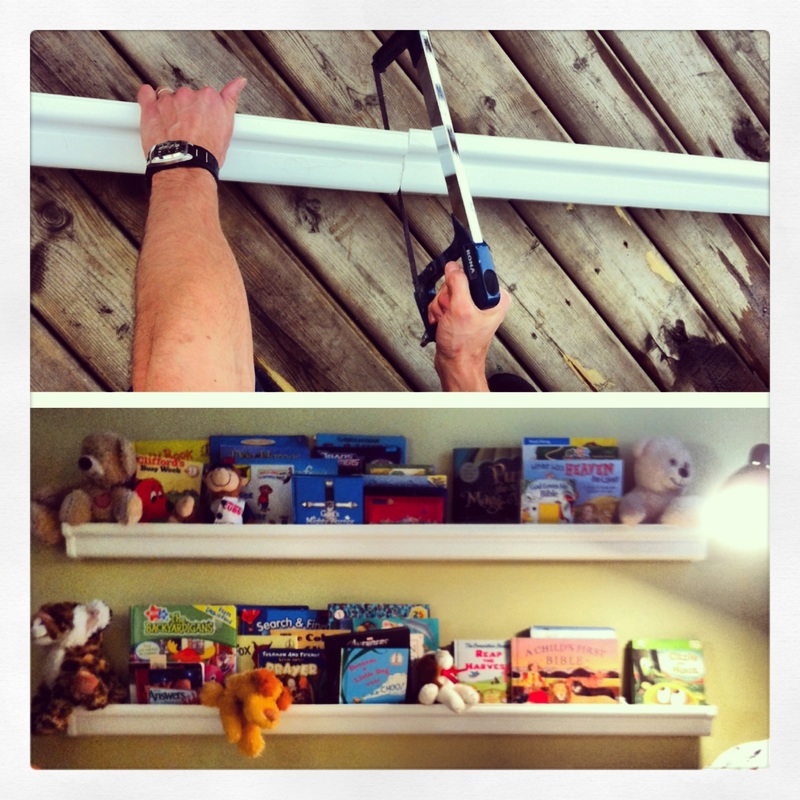 Tools required: 3" screw for each mounting hanger Drill Tape measure Hacksaw Stud finder Level Step 1. Go to your local hardware store and purchase as many lengths of vinyl eavestrough as desired. Purchase 2 end caps each each shelve and enough mounting clips to install one every 3' along the length of your shelf using a minimum of 3 per shelf. Step 2. Cut the vinyl eavestrough to the desired length of shelving using the hacksaw. Measure and mark your cut on the front, bottom and back of the eavestrough to ensure a straight cut. Step 3. Select the desired location for the shelf and locate the wall studs using the stud finder. Measure and mark out the stud placement on at least three studs as evenly spaced as possible ( studs are built into your wall every 16") along the length of your shelf, or one every 3', whichever is greater. Use the level to ensure level placement of the hangers. Step 4. Using the 3" screws and drill, install the hanger brackets along the studs you just marked out. Ensure they are level. Step 5. Clip the end caps onto the length of eavestrough to be installed and clip the eavestrough into the hanger brackets firmly. Your eavestrough is now a shelf 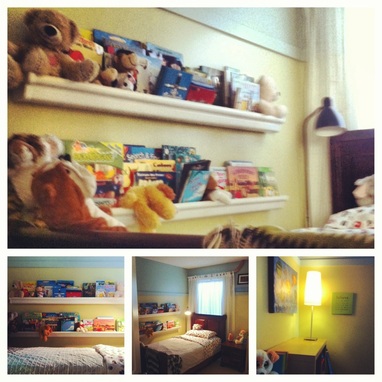 |
Sara Lynn InteriorsHOME AND GARDEN BLOG Archives
October 2013
Categories |


 RSS Feed
